When we moved into our old place, one thing sorely lacking was storage space in the kitchen. Then, when we moved into our new place, one thing sorely lacking was storage space in the kitchen. We are leaning toward the conclusion, therefore, that many kitchens do not have adequate storage space for foodstuffs and cookware. Fortunately, in our old place we pieced together some dimensional lumber and made a functional pantry cabinet. We had the foresight to dismantle it and move it with us to our new place, and we're glad we did. Even though we built it to fit a specific space, it's found use again, and seems to be of a size that might actually be useful in a number of households. It is therefore with a small sense of pride that we share the plans and construction with you, dear readers.
 |
| We began with some 1 x 12"s and 1 x 2"s, cut to length as shown. The 1 x 2"s are cut either to the width of two 1 x 12"s or to the width of one 1 x 12". The bottom cross piece is 3/4" square, but could easily be another 1 x 2". The 35-5/16" height of the front board was what we needed for the top of the main shelf piece to be even with the top of our counter. Note that a six-foot 1 x 12" is actually a little longer than six feet. The lumber companies are kind enough to leave some room for squaring the ends. |
 |
| Once we had one side complete, we made another one! |
 |
| Then we connected them with more pieces of 1 x 12". The width here is 23" across the top two (21.5" for the other two), but could be whatever fits where you need it. Screw them in from the bottom of the 1 x 2"s to keep the thing looking pretty. |
 |
| Then we added more 1 x 2"s as trim around the front side. They also give a sturdy piece to support the hinges. |
 |
| Making the doors is the only place we had to do some serious ripping (lengthwise cutting) of boards. We took 1 x 12"s and cut a half inch or so off. These smaller pieces were actually what we used for the bottom cross pieces in the first picture. I guess that makes the dimensions of the bottom cross pieces incorrect. Good thing it's not that important! |
 |
| If we left the doors closed, we might have forgotten that there's no shelves in there yet! Fortunately, we remembered to open the doors and add shelves (21.5" long). For these, we actually didn't screw them into place, they just rest on the 1 x 2"s. |
 |
| One design feature Katie thought of (and that has proved incredibly useful) is to put vertical pieces a few inches from the side to hold up cutting boards, cookie sheets, cooling racks, special ribbed plates for cooking bacon in the microwave, or whatever. Anything that makes it easier for Katie to bake cookies is a worthwhile addition. We left a gap of about 6" from the left wall in ours. |
 |
| At this point, we called it done. It was right up against a wall in the back, so we didn't see the need to put a solid back on it. If you wanted to enclose yours, two 1 x 12"s would leave a half-inch gap in the 23" span. Sometimes a little circulation is good! It's pretty sturdy without the back, but side-to-side pressure can make it sway a little, and adding a back would help mitigate that. We found that if it's supported between a counter and a window sill, it'll be rock solid, even when practicing kung fu in the kitchen. |
 |
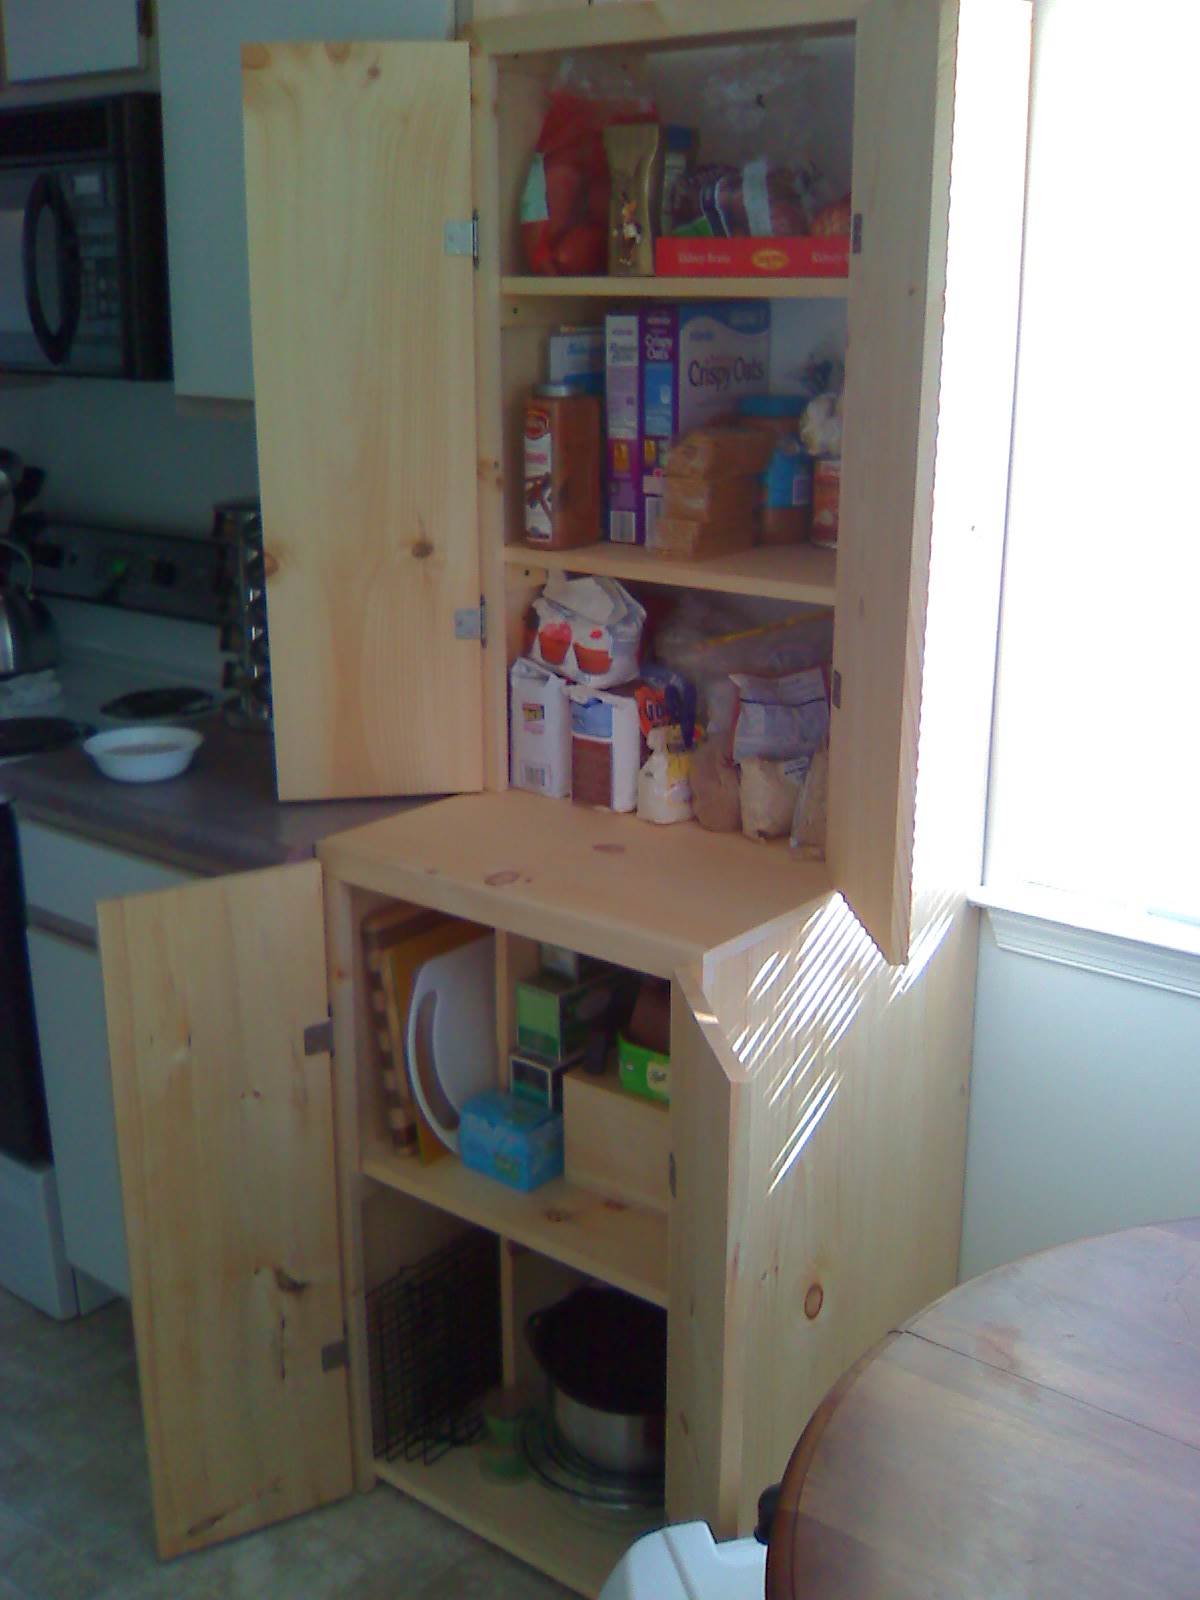
| The next step is to fill it with goodies! Well, OK, you could finish it with a nice stain or some paint first. We prefer the natural wood look. (Or at least, that's how we help justify filling it right away because we needed the space pronto!) |
If you'd like to download the Google Sketchup model, you can get it
here.
Have you built similar storage devices in your kitchen? What other design features could we have included in the pantry to make it even easier for Katie to bake cookies? Let us know in the comments section below!


No comments:
Post a Comment