Showing posts with label Human Power. Show all posts

Sunday, October 25, 2015

Green Onion Powder, Take 2

A while back, we wrote about our green onion powder, which turned out to be a great way to preserve green onions when we had too many to use up fresh.  Earlier this summer, we found ourselves in a similar situation with some overwintered onions that suddenly bolted.  And, as with everything else around here, the process is constantly evolving.  So, here's another couple ways to make green onion powder.

Onion stalk overload!  Ahh!

Cleaned and chopped, they look much less intimidating.  We mentioned that our makeshift solar wax melter only reached about 155 °F, which wasn't very good for melting wax, but is just right for drying food.  We're still working on making dehydrator trays to fit our Langstroth boxes, but the regular dehydrator trays stacked inside give a visual approximation.  Not shown in this picture, but also dried in this batch were some chopped garlic scapes and dandelion roots.

A few weeks later, they're nice and dry.  They probably didn't need so much time, but we got busy with other stuff and had to let them go that long.  The onions probably would have been good for grinding straight from the dehydrator, but we had the unfortunate scheduling demand of taking them out first thing in the morning, when it was cool and damp.  So, in the oven they went at 150 °F for an hour to re-crisp them up.

For the grinding, we turned to the grain mill, which we've now used on eggshells, sugar, sea salt, and green onion powder (also garlic scape powder and dandelion root powder), but not yet grain.  As with the other substrates, it makes a nice, fine green onion powder.  It works really well on the garlic scapes and the dandelion roots, but the chunks of onion we had were a little too large and flimsy (even when crunchy) to really feed into the grinder well.

So, after a while, we turned to the blender (a food processor or spice grinder would also work here).  It doesn't get everything chopped up perfectly, but for many applications (like soups or casseroles, for example), the larger chunks would be fine.

We sieved out the big chunks anyway to get some fraction of fines that make a good powder, and the rest we saved for cooking when the size doesn't matter.

Just for comparison, on the lower left is the grain mill powder, on the upper left is the fines from the blender, and on the right is the coarse fraction from the blender.  All perfectly useful in their own right, and all filled with that excellent green onion flavor.


How do you make green onion powder? (Or regular onion powder.  Or other powdered garden things.)

Monday, August 19, 2013

Washing our Wasps

On Thursday, we wrote about the second law of thermodynamics, which explains, in a sense, why clutter seems to naturally increase around a homestead of any kind. Today, we'd like to write about the fourth law of thermodynamics, which is much less-known. The fourth law states that when the ambient temperature approaches summertime values, residential buildings will experience a dynamic flow of wasps attempting to construct nests in the protected outdoor spaces most inconvenient for the occupants of said buildings. (Don't bother looking that up; it's only in very advanced textbooks not available to the general public.) We have experienced the fourth law in full force this summer. (To the tune of two dozen nests around our garage and shed, although not all of them are active.)  And like the second law, we will fight thermodynamics on this front as well.

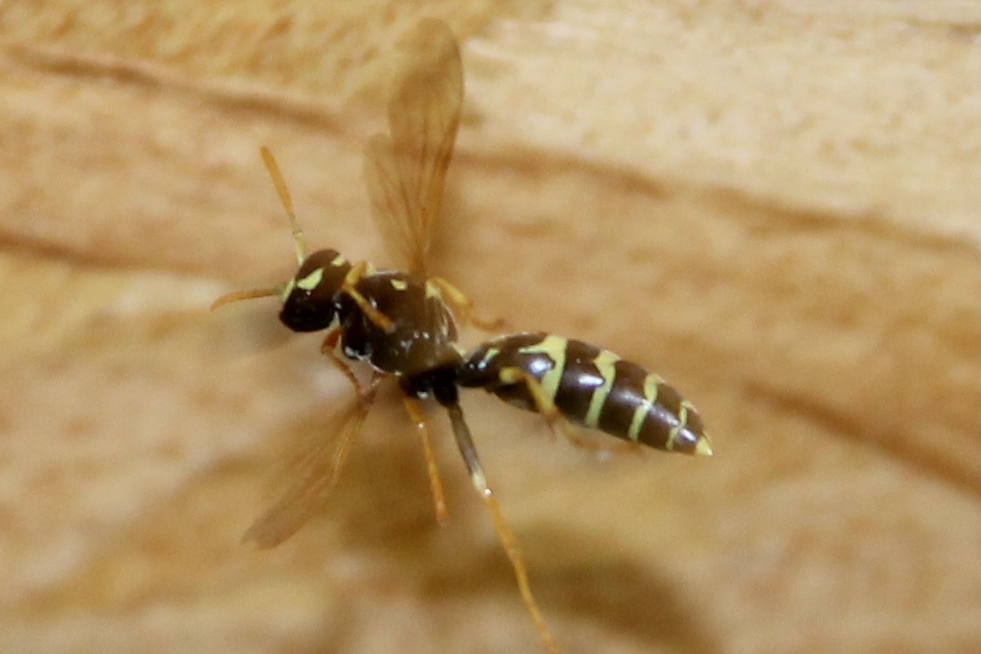
Accentuated constriction between thorax and abdomen, long gangly legs, loitering around in sheds...yup, that's a wasp alright.


It is actually with mixed feelings that we write this post.  Wasps are quite beneficial for the garden, preying especially upon pesky caterpillars of various flavors and many other antagonistic insects.  We would prefer to ignore the wasps if possible, but when they are building in our primary work areas and other places we are likely to disturb them (as dictated by thermodynamics), they've gotta go.  Also, the European paper wasps we're seeing are non-native and have displaced many of the local native species, basically by being better at their job than the natives were.  Apparently, it's possible to relocate the nests by taking them down and reattaching them elsewhere with superglue, but when the colony has more than one or two wasps, we can't see this ending happily for anyone nearby.

The standard approach to removing these helpful pests is to go to the store, get a can of synthetic chemical-laced spray, and blast the nest at dusk from 15-20 feet away. (Other/inert ingredients = petroleum distillates, which are not all that 'inert' for humans or aquatic life).  The wasps fall to the ground, hacking and sputtering, and die a minute later.  The nest is knocked down and stomped a couple times with thick-soled shoes just to make sure everything is good and dead. (Ironically, just the "inert" ingredients are typically enough to kill the wasps, which you can see for yourself if you happen to have petroleum distillates around, e.g., for cleaning up oil-based paint.)  The "active" ingredients are typically pyrethroids, which are longer-lasting synthetic versions of natural pyrethrins.  The natural pyrethrins can be extracted from chrysanthemum flowers and are even permitted in "official" organic gardening. Pyrethroids are not.

We started thinking about what we might do to get rid of the wasps instead of buying a can of spray.  So, we began our reseach on natural ways to kill wasps by doing what many technically literate humans do these days: we asked the Great Googley Moogley.  As usual, the internet was full of people who have already solved our problem.  Apparently a soap and water mixture will knock 'em down pretty well, and all we needed was a sprayer to get the mixture there from a safe distance.  The sprayers are not terribly expensive, and have a multitude of other uses around the homestead.  (Supersoakers have such small reservoirs and slow delivery that they're not even practical.)

So, here's how it went down in our neck of the woods.
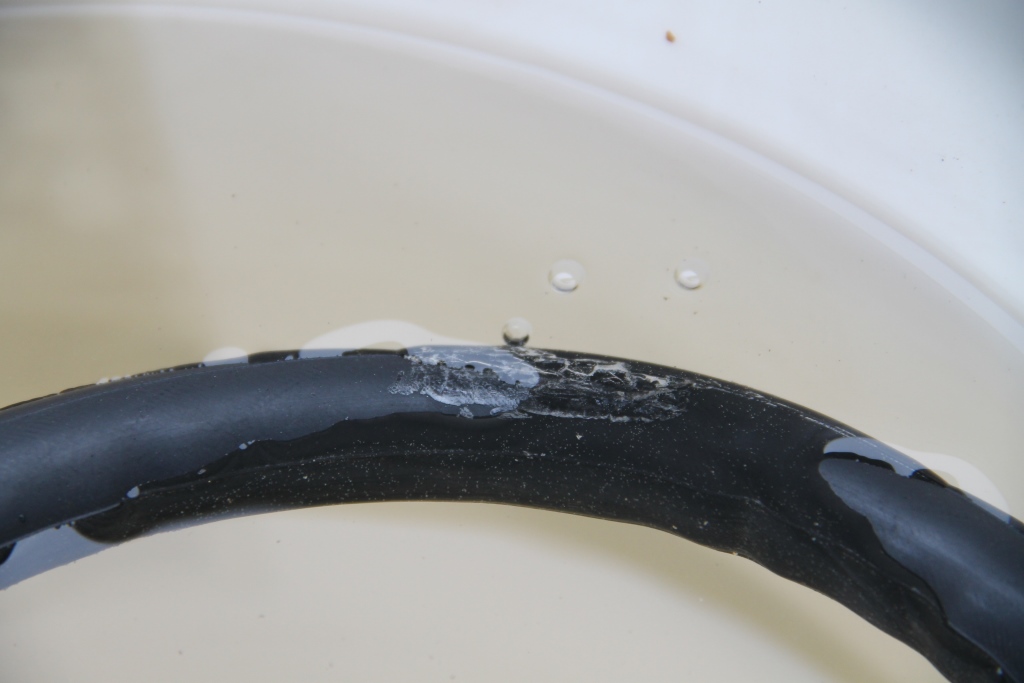
Trouble brewing.

More trouble brewing.  It's looking right at me!  Run away!  Just kidding.  Apparently, wasps have facial recognition capability.

So just in case any wasps are reading this post, here's a message just for them.  Yes, that is the wasp's head from the previous picture, cropped to perfection in MS Paint.

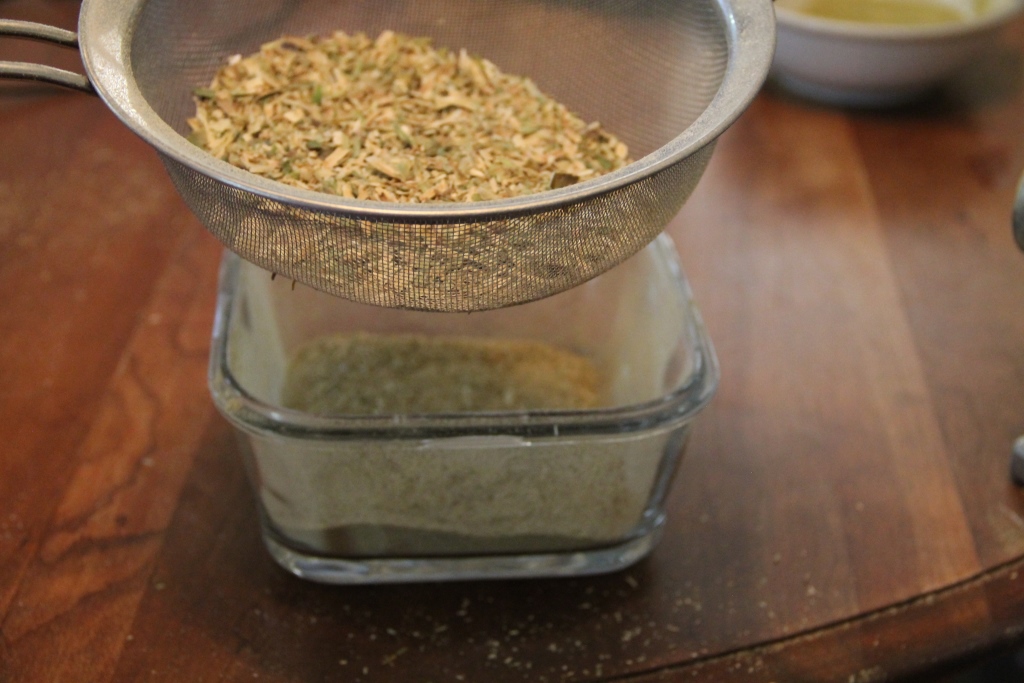
Here's our sprayer, it's a one-gallon model.  $10 at Home Depot.  We used a mixture of about 0.5 cup dish soap in 0.5 gallon water, but we didn't need nearly that much solution, even for the two-dozen nests we had to knock down.

We pumped it up fifteen or sixteen times and adjusted the sprayer nozzle to put out a good jet.  That looks like it shoots pretty far!  At least we'll have a chance to get away if it doesn't work.

Here it goes!  We sprayed the heck out of the nest, but in reality, all the wasps fell to the ground in the first few seconds, hacking and sputtering just like they do when sprayed with the commercial spray.  Sorry there's no close-up of the action--the photographer was being kind of a scaredy-cat. :-)

And then after a minute, they just kind of...died.  Weird.  But there you have it...soapy water is just as effective as a can of commercial wasp spray.  Apparently it works for two reasons: insects breathe by diffusion of oxygen through tiny holes in their skin called spiracles and are covered in a waxy coating.  Just water, with a high polarity and surface tension, doesn't affect insects because it's repelled from the waxy coating, and the insect can close its spiracles to keep the water from getting in.  The soapy water has a much lower surface tension, so it can get into the spiracles (maybe through capillary action?), which essentially stops the insect from 'breathing'.  Also, the soap can dissolve the waxy coating, which lets both the soap and water underneath the insect's exoskeleton, where they wreak havoc on cell membranes and stuff.  Not sure if anyone has actually quantified those two effects, but just spraying insects with water doesn't kill them, so the soap is definitely doing something.  Now we just have to figure out what to do with the extra soapy water we mixed up.  Car wash?  Cat wash?  Extra distance from the sprayer would be good there.  Here's an idea: Katie, you take this little pistol-shaped squirt gun.  I'll use this big, lumbering, slow sprayer thing.  Now, we'll stand back to back, take ten paces...

 Have you taken out any yellow-and-black pests without the cans of commercial spray?  Do you have a good way to encourage wasps to relocate without having to kill them?  Let us know in the comments section below!


Thursday, June 27, 2013

Powdered Raw Sugar

Our wonderful hand-crank grain mill advertises on the side of the box that it can be used for wheat, rice, oats, barley, rye, peppercorns, spices...and more!  We've been focusing mostly on the 'and more' part because, well, what's the fun of an experiment if we know it's going to work?  Anyway, the other day, we found ourselves asking the question, 'what's the fastest way to counteract the enjoyment of eating a dessert dusted with powdered sugar?'  The answer, of course, is accidentally inhaling just before taking a bite and having the powdered sugar lift off the surface of the treat and fly directly into our sinuses or lungs.

'Why does powdered sugar have to be so fine, anyway?' we asked ourselves.  We understand that for some things, like frosting, the particle size affects the texture of the product, and some folks don't like even a hint of graininess on their confections.  (They are confection perfectionists.)  Then we thought, 'wait a minute, we don't mind a little graininess (maybe we won't even be able to tell!), and we have a tool to fix this!'  Since we can change how finely ground things come out of the grain mill, we can make powdered sugar that isn't quite so finely powdered!  Then Katie can make some lemon bars and we can sprinkle our not-quite-so-powdery sugar on them and see if we still accidentally snort the stuff.  (Katie's lemon bars alone would be worth the experiment.)

Additionally, one of the drawbacks of using raw sugar, which is like a strange combination of brown sugar and white sugar with large, brown transparent crystals that take forever to dissolve in anything, is that the crystals are too darn large.  We could probably cut the crystals in half and make them into a much more usable form.  So, let's see what the grain mill can do!

We're going to try to grind a half cup of the raw sugar into powdered sugar, and half cup into the same size as standard granulated white sugar.  First up, the powdered sugar!
Off to a good start!  It looks like powdered sugar, but not quite as fine.
The problem with the very fine grind is that it takes forever.  So we loosened up the mill a little bit.  Now it still makes a pretty fine powder, but it goes faster.  You can see that it's not quite as fine as the first stuff, since it's a little more brown-colored (and the particles look larger).
One of the reasons it takes a long time is because of a phenomenon called 'bridging.'  As some of the particles fall into the mill, the ones above readjust, and hopefully fall in, too.  But sometimes the particles on top can form a structure that won't fall in on it's own (think like a stone archway on a fireplace).  So it's necessary to keep stirring the hopper to keep things moving.  Since we were only rotating the grinder with one hand, this left the other hand to stir with a wooden spoon.  Clearly, some of the grinding happened even without going through the grinding wheel.  The other reason this is taking a long time is that the grooves in the grinding wheel are getting packed up with the fines (the very small particles).
We opened up the mill a little more, and were still able to get a fine enough powder (the right-hand half), but it went a lot faster.  The first half cup of raw sugar took about an hour to grind into powdered sugar, but more than half of that time was spent trying to find the right setting on the mill.  With more practice, that part will go much faster.
The second half cup of raw sugar we wanted to turn into grains the size of standard white sugar, and it went a lot faster.  The whole half-cup took about 15 minutes.  Clearly, some of the particles are still smaller than the target size, but the main goal of slightly decreasing the particle size was still met.
Here are our four grades of raw sugar.  Regular raw sugar on the far left, most coarsely ground next (approximately white table sugar-sized), and the two finely powdered sugars, which are both still a little coarser than the confectioners sugar you get at the store.
One of the issues with any grinding operation like this is that the product has a certain particle size distribution.  The bowl on the right in the previous picture has all grains that are small enough for what we want to do. The bowl on the left, however, has the unground raw sugar and the coarsely ground stuff, which itself has a range of particle sizes.  So, we can sieve them to separate out the sizes we want.  For now, we're just going to use a set of colanders with different screen sizes.  The biggest one looks like it won't let the raw sugar through but will let the rest pass.
It worked!
The next finest one looks like it will let the powdered stuff pass, but hold back the table sugar-sized stuff that was our second goal.
It worked, too!  The stuff that made it through the second colander still has quite a range of sizes, but we're out of screen sizes to use. (Plus, we've proven the concept and the mix is fine for our own use.)  The four bowls in front are the grades from the grinding (the far left is unground).  The two bowls in the back are the standard white sugar and commercial powdered (confectioners) sugar.  They're in order of grain size, decreasing from left to right.  If you want to know more about the actual standard grain sizes of sugars, check page 42 of this book.
It's easier to see the range in grain sizes on something else, like strawberries!  The far right is the commercial powdered sugar, and the third from the left is the standard white sugar.  Let's make some lemon bars!

One lemon bar down, intentionally inhaled just before biting, and no sugar in lungs or nostrils...that means it worked!  Good job, Katie.  Better eat a second one just to make sure it wasn't a fluke.


We could've probably made the powdered sugar a lot faster with a food processor or blender, but it's good to know that the grain mill will work if we need it to, and that the colanders will work to sieve out the larger particles, which would still be there with the other methods.  In the future, maybe we'll work on a solar-, wind-, or human-powered ball mill to do this kind of work.  Stay tuned for updates on that!

Have you ever accidentally snorted powdered sugar off a lemon bar?  Do you have a different way to make powdered sugar?  Tell us about it in the comments section below!


Thursday, May 23, 2013

Shaving with a Garden Knife

On Sunday, we tried applying the Scary Sharp method of knife sharpening to a straight-edge garden knife, and found that it only took a half-hour or so to get it from "found-in-the-silverware-drawer" dull to "easily-shaves-arm-hair" sharp.  Since our ultimate goal was to be able to shave with it, our natural next step was to take it into the bathroom and see if our success with hair on the corporal extremities could be extended to the chinny-chin chin.

It's working!  It's working! Ha ha ha!  For some reason, we forgot to take a 'before' photo, so we have to jump to the halfway point.  Should I stop here, Katie?  "No, someone might confuse you for Harvey Dent."
The finished product.  OK, the process could not exactly be described as 'pleasurable,' but it's a clean face produced by a garden knife we found in the drawer a couple hours prior.  Solid A-minus work.  (Edit: Katie says, "But it took you an hour to shave, you didn't get as close as you do with the normal razor, and you've got lots of nicks--more than usual.  It is pretty cool you could take a random knife and make it sharp enough to shave with, but still...B-plus tops.")

Admittedly, the knife is definitely not as sharp as a normal 4-blade cartridge razor, and it's probably good the shaving cream has lots of aloe in it.  This was a first try on the straight blade shaving, but there's definitely more missing than just operator inexperience.  So...what do we need to improve for the next attempt?

Quick searching of the internets suggests several details of preparation that experienced straight-blade shavers tend to, even when they're using the proper tools.  In many fields of research, there is a saying that, "an hour in the library can save a month in the lab."  In the Homestead Laboratory, it also seems that five minutes on the internet can save an hour in the bathroom.  But anyway, what did we do wrong?

  1. Not fine enough honing.  We topped out at 2000 grit sandpaper.  Some sources recommend working up to a surface with at least 4000 grit, and even up to 8000 grit.  Given the difference in the ol' arm hair test between 1500 and 2000 grit, this alone could account for a lot of the discomfort.
  2. No stropping.   Even after honing with a very high-grit sandpaper, stropping with canvas and/or leather is required to straighten out the micro-teeth still present on the cutting edge from the abrasives.  It's advisable to work sequentially down to the point where just the bare leather strop (or, more precisely, the silicates present in the leather) are able to quickly put a finishing edge on the blade.  Chromium oxide is commonly recommended as a 'stropping compound' (with grit between sandpaper and leather silicates), although some folks also claim success with the more DIY-friendly wood ashes.
  3. Insufficient beard prep.  Keeping a beard warm and pliable is a whole 'nother ball game compared to arm hair.  If it takes an hour to get from one ear to the other, there's a lot of time for the beard hairs to cool down and decide they don't want to be shaved, after all.  This was definitely part of the problem, even with frequent re-warming.  Still, the current blade would probably work fine for eyebrows, if we wanted to shave them off for some reason.
  4. Wrong tools.  Well, maybe.  Using a random garden knife to shave certainly didn't make things any easier, but folks who know what they're doing seem to be able to make just about anything work.
 How do you shave sustainably?  Do you have any other suggestions for us?  Let us know in the comments section below!

Sunday, May 19, 2013

SCARY Sharp

The second law of homestead thermodynamics goes something like 'sharp things will always tend to become dull.'  This is especially true if the sharp thing is a blade on a tool you need for the next task on your list.  We we were reading about ways to sharpen blades a while back, and since blade sharpening one of the skills we wanted to develop this year, we figured we should probably get around to it (it is almost June, after all).

The best description we've come across of how to sharpen a (flat) blade is this tale of the Scary Sharp method.  Even if you don't have any blades to sharpen, it's worth a read.  Make sure you're not drinking anything at the time, because you might accidentally spit it out.  Basically, the technique involves a hard, flat surface (like a piece of glass) and increasingly fine grades of sandpaper.  Pretty simple, eh?  The method works best with straight (as opposed to beveled) blades, but it was good enough to get a beveled hunting knife back to factory sharp last fall. (Not quite sharp enough to shave, though, which was another one of our goals).  So we decided to try the same technique on another knife with a flatter blade in hopes of being able to rediscover Jake's face!

*NOTE: We could not be considered experts in blade sharpening by any stretch of the imagination.  We are simply chronicling our experiments in learning to sharpen blades proficiently.  If you're searching for a way to sharpen your own blades, please don't use us as your only source of information. :-)


Here are our materials and our setup.  Sandpaper: 400, 600, 800, 1000, 1500, and 2000 grit.  A pane of glass from an old window (came with the windows we got for free for the coldframe), and a knife.  The knife is a one-edge straight blade, stainless steel (the blade style is more visible in the next picture).

Here it is after the 400 grit.  We sanded all three faces: back, front, and cutting edge.  Since the cutting edge had coarse marks in it from the factory grind, this grade of sandpaper took the longest (about 15 minutes).  We wanted to get it to the point where all we could see were the scratches from the 400 grit sandpaper.  When sanding the cutting edge, it's very important to keep a consistent angle between the knife and the sandpaper.

After the 600 grit.  It might not look much different, but for alternating grades of sandpaper, we try to use a different sanding pattern.  For one grade, we move the knife in straight lines back and forth (parallel to the handle for the front and back, and perpendicular to the handle for the cutting edge); for the next grade we move the knife in a circular pattern.  That way it's easier to see when scratches from the current grade of sandpaper have erased scratches from the lower grit.

After the 800 grit.  You know we're getting serious now because the sandpaper has switched to black.

The 1000 and 1500 grit looked pretty much the same as the 800 grit, so we skipped to the picture of the 2000 grit, where we've gotten a sort of mirror finish on the blade (reflecting the sandpaper box on the flat part).  Must be sharp now!

The classic test to see how sharp it is (other than cutting a piece of newspaper or something more reasonable) is to see if the blade will shave off a few arm or leg hairs.  After all, the closest piece of newspaper was like, ten feet away.  Looks like it will take off some leg hairs, no problem!  (Edit: Katie says, "Jacob!" [uh-oh...she only calls me that when I'm in big trouble.] "Did you shave off a random patch of extremity hair just to see how sharp your knife was...again?!"  Response: "Yes, but this time it will still be covered by my shorts, so I won't have to wear long-sleeve shirts for two weeks!"  Re-response: *eye rolling.*)  Can't wait to see how it works on facial hair!

Tune back in on Thursday to find out if the newly sharpened knife works for shaving facial hair!

Do you have a favorite technique for getting knife blades razor-sharp?  What is your preferred test of knife sharpness?  Tell us about it in the comments section below! (so Jake can stop having random hairless patches on his arms and legs!)


Sunday, May 5, 2013

Patching Bike Tires, Method #1: The Easy Way Out

We noted a while back that one of the skills we want to develop this year is the skill of patching bicycle tires.  In particular, the road shoulders and bike lanes seemed to be cluttered with an abnormally high concentration of pokey things this last year, resulting in more flat tires than we had in the previous three or four years combined.  We were in the neighborhood of a dozen or more flats, which if replaced with a new ($5.00) inner tube every time, can start to add up.  (That's more than a tank of gas costs!  Unacceptable!)  Also, even though there's lots of uses for inner tube rubber around the homestead, eventually the tubes (or at least part of them) will end up in a landfill.  That's definitely something we want to avoid.  Fortunately, patching an inner tube can be ridiculously easy, and pretty cheap, too.  This morning, we had a patching party in the kitchen to repair the collection of holey tubes we had accumulated before getting smart.  We note that although our focus is bikes, the technique is applicable to most equipment with similar tires that can go flat, including wheelchairs and baby strollers.  It's valuable for all stages of life!

The first step (for the most recent casualty, anyway) is to get the tube off the rim.  That requires two tools with which to apply leverage and bring the tire bead outside the rim.  The one on the left is a plastic tire lever designed for this purpose and is recommended by bike experts because it doesn't scratch the rim or damage the tube.  The one on the right is a screwdriver and is not recommended by bike experts for the opposite reasons.  But we've had good luck by being very careful.  The advantage is that the screwdriver can give a lot more leverage than the tire lever.
Once the tube is off the rim, the next step is to figure out where the leak is (unless you already know).  We pump the tube up a little bit and 'listen around the tube' to see if we can hear air hissing out anywhere.
If we can't (i.e., it's a fairly slow leak), we take the tube to a bucket of water and look for bubbles.  This happens a lot if it's a puncture leak, like we somehow managed to ride over a tiny pin at exactly the right angle.
Once we know where the leak is (which in this case turns out to be an old patch that didn't hold because we're new at this), we can let most of the air out of the tube.  Make sure the tube and your hands are clean and dry.  It might also help to hold the tube flat against a table top, if one is available.  Cast iron frying pans work well as paper weights (rubber weights?)  Also pictured is our patch kit--it has six patches for $3.00.  In other words, we get a 'new' tire for $0.50, which is a little more tolerable than $5.00.
In addition to the six patches, it comes with a free 1" x 1" piece of ~220 grit sandpaper.  Bonus!  The idea here is to rough up the tire in the area of the hole to help the patch stick.  Make sure to smooth down the ridges in the tire, get rid of any superglue you might have added to the old patch because you touched the sticky side with greasy hands and the edges wouldn't stay stuck, etc.  The area where the patch is going should be flat and no longer shiny.  Also, when you've gotten to that point, make sure to clean off any rubber schnibbles from the sanding.
The rubber is now ready for its patch!  Peel the new patch off the backing, being careful not to touch the sticky side with bike grime-covered fingers, and apply the patch to the tire.  Press it down hard, like with the back of a fingernail or something, and make sure it's all even and stuff.  Man, whoever fixed that tire might not have buffed up a large enough area for this patch to hold reliably, but he should definitely be a hand model.  Mint condition, baby.  (It's almost never that clean.)
There she be!  Looks like solid B+ level work.
Some say to let the adhesive set for a while before testing it.  That may not matter for the ready-made adhesive patches as much as for other kinds of patch kits that come with rubber cement and separate patches, but since we don't need all six patched tires right away, we figured it couldn't hurt.  Thank goodness we also didn't need the frying pans, or we would have had to invent a hexacycle.
Now we've just got to get the fixed tube back in the tire and on the rim.  It's a good idea to check both the tire and the rim to make sure whatever cased the flat in the first place is not still there.  Once convinced that all is clear, pump up the tube slightly (just enough to make it round), and work it into the tire, and eventually onto the rim, starting first by putting the valve stem in place.  Yes, that is duct tape augmenting the original rim tape, which has started to lose its stickiness and doesn't cover some of the rusty spots on the inside of the rim.
Work around the rim, popping the bead of the tire back into place, being very careful not to pinch the tube in between the edge of the rim and the tire.  The job will get progressively harder as you near completion.  Some say to avoid leaving the part by the valve stem for last, but we like to end at least near the valve stem because the tube is sort of anchored to the middle of the rim there and seems least likely to interfere with popping the last section of tire back onto the rim.  It should be possible to pop the tire back on with just your thumbs, but it will take considerable effort.  Fingertip pushups will help (over time), which is an additional translatable nugget from learning kung fu (in addition to manual almond chopping).
Time to flip it over and pump it up to test!  If it holds, you can ride off into the sunset on your newly repaired bike (depending on which way you need to go).
For further reading (but fewer pictures) from someone much more knowledgeable than us, see Sheldon Brown's article on the matter.  Actually, we've found Sheldon's articles to be a good starting point for almost any bike repair.

This method of patching bike tires is probably the most convenient available.  It's also very inexpensive, but it's not quite homemade-enough for us.  We'll continue working on this skill and report back when we have a more homestead-friendly version!  In the meantime, if you have any suggestions on how to improve our technique, either to improve our results with this method, or a more DIY version, tell us about it in the comments section below!

Thursday, March 28, 2013

Green Onion Powder

Last summer, we had quite a few green onions come out of our garden (more than we were interested in making use of while they were fresh), so we dehydrate a bunch.  We cut them into small sections and set them on the trays, but realized that as 'sections,' we weren't using them up very quickly.  The pieces work fine for casseroles, soups, stews, etc., but not so well for seasoning dishes the way we usually do, by sprinkling the seasonings on.  (We're habitual sprinklers.)  Then we realized that one of our favorite seasonings is onion powder (or granulated onion, depending on what your source calls it).  Now, this is going to seem terribly obvious, but couldn't we just grind up the green onion and use it like onion powder?  Turns out we could (and did), and we love sprinkling it on eggs, toast, steaks...basically anything on which we would normally sprinkle regular white-colored onion powder.  Of course, a quick internet search shows we're not the first ones to think of grinding up our green onions, but since we hadn't heard of it before, we wanted to help spread the word.

One of the green onions in our garden was still kind of a runt at the end of the growing season, so we brought it inside to the aquaponic system, where it flourished.  Just this last week, we finally decided it was time to pick the little guy since he was starting to get a flower bud.  Since we were going to turn it into powder, we thought we'd write about it on here in case anyone wanted to try it with their own green onions!

Here's the fresh starting green onion.  It grew surprisingly well in the aquaponic system, although we're  surprised when anything works around here. :-)
Cut it into pieces large enough that they won't fall through the openings in the dehydrator tray, and dry them for a couple days. 
After the dehydrator, we've found that they're pretty dry, but not quite crispy enough to grind right away.  So we put them in a warm oven for a couple hours (like after we take a loaf of bread out and the oven is cooling down).
Put the über-dry pieces in the mortar.  In this case, the whole onion fit at the same time.
Grind it up with the pestle.  It took about 20 seconds to get to this point.  It's hard to see, but some of the onion is a very fine powder and some is still relatively large pieces.
So we normally filter it to collect the fines, and put the big pieces back in the mortar.
Then grind just the big pieces, now that they don't have the little pieces to pad them from the mortar walls.  Bwa ha ha haaa.  We'll get them yet!
Once everything goes through, put the powder in whatever container you're planning to store it in.  If there's a few pieces that still won't go, add them to the leftover Reuben Strata you're about to heat up for supper (or many other kinds of leftovers).  It's interesting that the fresh stuff is a different color than the stuff we made last fall.  We're not sure why--if the other stuff changed color over the last few months, or if the aquaponic onion is actually a different color.  Time will tell!

Have you made green onion powder before?  What's your favorite food to which to add green onion powder?  Tell us about it in the comments section below!