Saturday, February 20, 2016

Eggshell (Calcium Carbonate) Leavening, Part 1

A few weeks ago, we were reading a 5 Acres and a Dream blog post about making homemade leavening from wood ashes (i.e., from potassium carbonate, K2CO3), and a reader in the comments section asked if calcium carbonate (CaCO3) from eggshells, which also reacts with acid to release CO2 gas (reaction below), could be used as a leavening agent.  We had been wondering the same thing for quite a while, and the realization that other folks were wondering the same thing provided the motivation we needed to finally get up and do some experiments.

Reaction of calcium carbonate (CaCO3) in eggshells with acetic acid in vinegar
Calcium carbonate (CaCO3) reacts with acetic acid in vinegar to make calcium acetate, carbon dioxide gas (CO2), and water (H2O).

First, some eggshell chemistry.  Eggshells are about 95% CaCO3, but the CaCO3 is bound in a matrix of protein, with a proteinaceous membrane also attached. Thus, one might expect that eggshells would make a better leavening agent if the CaCO3 could be isolated from the protein (and/or ground very finely) so that it would be more accessible to the acid during baking.  The question is, how to get rid of the protein?  We'll have to either dissolve the protein away from the CaCO3 or dissolve the CaCO3 away from the protein and then regenerate it somehow.  Today we'll try the former.

There's quite a bit of precedent for dissolving away the eggshell protein (or at least, most of it) with a strong base, such as sodium hydroxide (NaOH) or potassium hydroxide (KOH), but specific recipes are hard to come by.  Several articles refer to this original gem, the most useful being this one, which allows us to deduce that those guys boiled their eggshells in a 2.5 wt% NaOH solution for 5 minutes, which easily removed the membrane and part of the protein matrix.  They then increased the lye concentration to 10 wt% and boiled for a long time, finding that all the protein that could be removed was gone by about 7 hours.  They didn't give a lye-to-eggshell ratio, though.  Additionally, this patent references another patent (we couldn't track down the original) claiming that boiling eggshells in 3 wt% NaOH would reduce the protein content of the shells to < 0.1%, although the boiling time and lye-to-eggshell ratio wasn't specified.

A protein content of < 0.1 wt% sounds good enough to us, so we decided to follow that route most closely.  Having to guess on the time and lye-to-eggshell ratio, we decided that if we had to boil for more than half an hour and use more than a 1:1 ratio, that it wouldn't be worth our trouble. (In that case, we'd just use Leigh's ash-based leavening instead!)  Alright, experiment planned; let's do this!

Starting to boil eggshells in lye water
Here's our recipe: 15 g NaOH, dissolved in 500 g tap water, with 15 g coarse-ground eggshells (1-2 mm particles) added.   Boiled for 30 min.  Wear safety glasses and gloves until everything is neutralized later on (see below).


Boiling eggshells in lye water
As the mixture simmered, the lye water turned a cloudy yellow.  A good sign that we're dissolving protein.


Filtering lye-boiled eggshells
After boiling, we poured the liquid through a coffee filter (supported by a polypropylene funnel) into a quart jar.  The eggshells don't look that much different than before, except maybe slightly darker.  The pigment (they were brown shells) is still there.  The coffee filter is really slow, so something like an old t-shirt or terrycloth towel might be better.


Filtrate from lye-boiled eggshells
The filtrate is still highly caustic, so be careful with it!  We wanted to neutralize it before doing anything else, so we added a couple tablespoons of our good ol' red cabbage pH indicator, causing the filtrate to go from yellow to slightly-darker-yellow.  Note if you're following along at home--dumping the filtrate down the drain without neutralizing might kill some of your friendly septic system bugs, so please neutralize!


Vinegar and neutralized lye solution
Then we added vinegar until it turned green, then blue, then finally purple, indicating a neutral pH.  (We had to add a few more tablespoons of pH indicator as it got more and more dilute, because the color changes started to get hard to see.) Now it can go down the drain or into the compost.


Decreasing pH of eggshell rinses after boiling with lye
The next step is to repeatedly rinse the boiled eggshells to wash all the lye off.  These are the rinses (plus pH indicator), showing steadily decreasing alkalinity.  After the fourth rinse (which was with vinegar), the filtrate is neutral, the eggshells should be substantially free of lye (and hopefully protein!), and we're good to move on (and take off our safety glasses and gloves).  We also neutralized the second and third filtrates with vinegar, too.  Safety note: working with lye on something you're planning to eat has the potential to cause some serious damage if you don't neutralize properly.  Be careful and only do this if you're comfortable with the chemistry! Also, make sure you're using pure lye, and not some cleaner that has lye combined with other chemicals.


Drying lye-boiled, neutralized eggshells
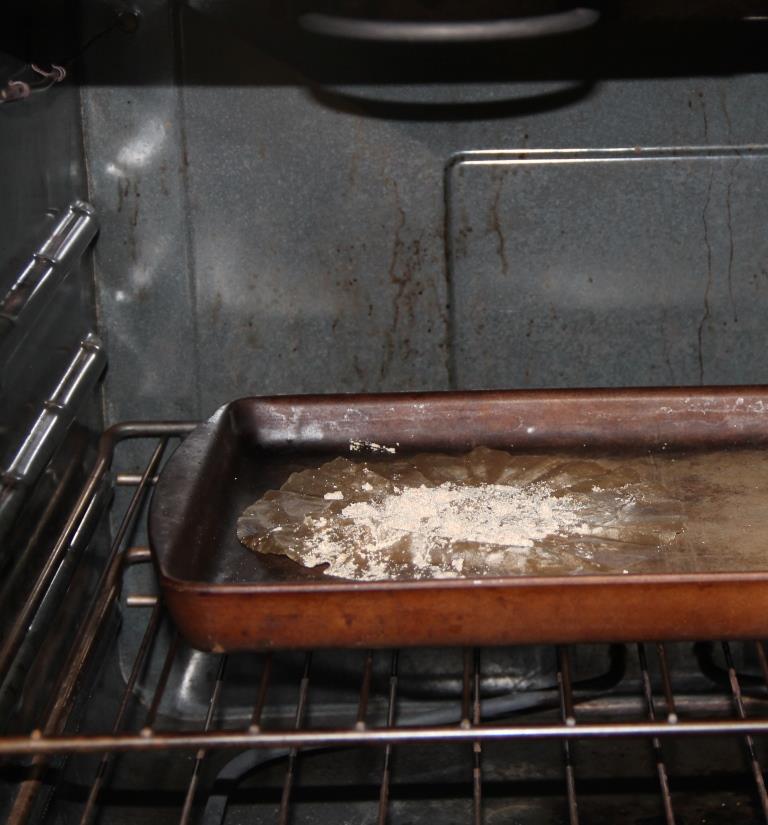
Drying the lye-boiled eggshells makes them easier to work with. In the oven at 300 °F for 15-20 min ought to do the trick!


Biscuit experiment preparation
Time to make some experimental biscuits!  Five sets of three biscuits each.  Recipe per set: 0.5 cups all purpose flour, 0.25 teaspoon leavening, 0.125 (1/8) teaspoon salt, 1 tablespoon butter (in the bowls), 1 teaspoon apple cider vinegar plus milk (2%) to bring the volume up to 0.25 cups to make a faux buttermilk (in the glasses).  We processed the bowl contents in a food processor for about 5 seconds to cut in the butter, then added the "buttermilk" and processed for another 5 seconds to mix everything up, scooped the dough/batter into drop biscuits and baked at 400 °F for about 20 min.  The five sets differ only in their leavening: no leavening, lye-boiled coarse-ground eggshells, coarse-ground eggshells, fine-ground eggshells, and baking soda.


Eggshell leavening biscuit comparison
After baking, there' a clear difference between the No Leavening control and the rest, but also between the baking soda and the rest.  Between the eggshell sets, the lye-boiled and the finely-ground are about equal, and slightly more risen than the coarse-ground.  However, all the eggshell sets are very close to each other, and closer to the control than to the baking soda.  Also, we didn't have enough room for all fifteen biscuits on this sheet, so we baked the third biscuit of the last three sets separately.  Their appearance was consistent with the biscuits here.  Hooray for reproducibility!


Eggshell leavening biscuit texture comparison
The textures are consistent with the appearance, but it's hard to tell from the photos.  Also, the biscuits other than the baking soda set weren't cooked all the way through after 20 min.  We put them back in the oven; after another 15 minutes they were no longer doughy, but they didn't rise any more.  The flavor of all the sets is decent, so the control set and the eggshell sets would make decent dumplings if you're into that sort of thing.  Overall, the conclusion from these experiments is that the eggshells provide some leavening effect, but not much.  For us, the ground eggshells don't really get the job done, and it's definitely not worth the effort of boiling them in lye water to dissolve off the protein.

But we're not done with these experiments yet!  Stay tuned for Part 2, where we dissolve and regenerate the calcium carbonate part, and see how that works as leavening!


Monday, February 15, 2016

Syrup Update

Of the eight taps we have in our yard sugar bush, only a couple have been flowing significantly.  The Tree of Heaven, both Bradford pears, and one of the Siberian elms haven't even made a drip, the other elm has about a cup of sap, and the Lombardy poplar has about half a cup.  But the other two, the box elders, have been running like a gazelle.  By early Saturday morning, we had collected 38.4 lbs of sap, which means it was time to start boilin' it down!

First: a measurement.  Our sap is starting off at about 2.5 wt% sugar, according to our hydrometer. Not bad for a box elder, pretty much in line with a study from St. John's University in Minnesota.  But more importantly, with that number, we can calculate all sorts of expectations for this batch of syrup.  Allow us to momentarily digress!
Boxelder Sap Balling
This is the sugar content of the box elder sap on the Balling scale, which is essentially the same as the Brix scale more commonly used for sap measurements. (Using the same hydrometer we use for brewing wine.)

For example, knowing the wt% sugar, we can use the tables here to calculate the density of the sap and the resulting syrup (because syrup is normally 66 wt% sugar, which is very close to the solubility limit at room temperature), which will give us the volume of the sap and the resulting syrup, and our expected ratio.  Those calculations are detailed in this spreadsheet, if you want to plug in the numbers from your own sap. For us, our 38.4 lbs of sap at 2.5 wt% sugar works out to about 4.6 gallons, from which we should be able to expect just over two cups of finished syrup. (But note the caveat below.) 

Sap-Syrup Calculations
38.4 lbs of sap at 2.5 wt% sugar should yield about 2.1 cups of syrup, which would be a ratio of 34.6:1.  That would be pretty good for a box elder.

We can also use other tables in that document to calculate what the boiling point of the finished syrup should be.  It would normally be 4 °C (7 °F) above the boiling point of pure water wherever we are, but that depends a little bit on what the boiling point of pure water is.  We're in the suburban Denver, where water boils at about 95 °C (203 °F) due to about 18% lower absolute atmospheric pressure. (Don't worry, we used NIST data for the Antoine equation to calculate the vapor pressure of water at that temperature, and everything checks out.  Well played, Universe.)  As it turns out, the difference in boiling point increase for syrup at our elevation is within the precision of our thermocouple reader.  Or, long story short, we're looking for a final temperature on our syrup of about 210 °F.  Time to light the fire!

Rocket Silo First Setup
We added a wind break to our Dakota Rocket Silo and started out using the widest-diameter pot we have.

Rocket Silo Second Setup
As we started to build up a bed of embers, the air flow through the chimney part dropped off quite a bit, and we weren't getting much 'rocket' effect.  So, we widened out the pit, raked some of the coals to the back part, and added a second pot on top.  The direct contact of the pot on the coals got that pot boiling a lot faster than the one on top of the chimney, even when the rocket effect was strong.  Conductive heat transfer beats convective heat transfer (with air) every time!  If you go this route, though, be careful not to get ashes, etc. in the lower pot.

Making small-diameter logs with a lopper
As a side note, if you're trying to use a lot of small-diameter wood (e.g., thumb-size branches from an unsightly, rabbit-attracting brush pile), breaking the sticks by hand might start to get old after the 50th or 60th one.  At that point, a loppers will become your best friend.

Box Elder Sugar Sand
With the volume decreasing by about half, some of the minerals ("sugar sand") started to precipitate out.

Rocket Silo Sap and Pancakes
Eventually, the volume got low enough to combine everything into one pot.  Time to make some pancakes!  We ended up adding one more layer of blocks back onto the wind break.

Rocket Silo Sap and Bacon
Pancakes done, sap still boiling.  We might have to modify our evaporator design for the next batch.  In the meantime, let's make bacon, too!

Finishing box elder syrup
Bacon done, sap at ~35% sugar.  Daylight running out.  Time to bring it inside to finish on the stove.

Finished box elder syrup
And.....the finished product in a pint jar.  It's delicious.

Ok, so the finished product looks much closer to one cup in volume than the two we expected.  Why the difference? (Here's the caveat we mentioned above.)  There are a number of potential contributions.  The equations above are for solutions of sucrose in water, so the initial 2.5 wt% reading we took didn't account for other dissolved solids (e.g., the sugar sand that precipitated out during cooking).  That is, we might have started out with lower than 2.5 wt% sugar.  Also, there were some losses on transferring between buckets and pans, filtering, and what we took out for testing along the way.  We were also physically unable to resist trying some of the 35% stuff on the pancakes, which probably accounted for at least 1/4 cup (don't judge!).  Finally, we also ended up going a little bit over 66% sugar (closer to 70%, based on our honey refractometer's scale, which had store-bought maple syrup right at 66%), which would decrease the volume, in theory, by about another 1/6 cup.   Overall, even if we got one cup syrup instead of two, our sap-to-syrup volume ratio was still a respectable 70:1.  In general, it looks like the calculations above should get you to at least within a factor of two.

How is your syrup season going?


Saturday, February 13, 2016

Butcher Block Counter From Reclaimed 2 x 4 Lumber

A few weeks ago, we mentioned that one of our main goals this year was to finish the butcher block counter (and corresponding cabinets) we built to give our kitchen some extra horizontal work space and culinary device storage capacity.  Finally, after more than a year of testing it in-place, we slapped some doors on it and put a water-resistant finish on the top.  There are a couple naggly things to finish up yet, like deciding whether we also want to finish the cabinet doors, but by and large, we think the project is ready for blog-reader eyes.

Pine butcher block counter, initial state
This is what it looked like a year ago.  We made the top out of reclaimed 2 x 4s (yep, pine!) that we planed clean and glued together.  The end-to-end length is about eight feet, so we made each row out of a six-footer and a two-footer, alternating the two-foot ends (i.e., one row was 6-2, the next was 2-6, and so on).  It's about 16 inches front to back. Despite our best efforts, there was a stretch in the middle where they didn't line up perfectly.  It took us about a year to acquire a belt sander, which made the job of blending the slabs tolerable.

Pine butcher block counter, patched
We also needed the sawdust from sanding to make some wood putty, of which a significant amount was required to fill in all the imperfections in the wood.

Nail holes
For example, there were a lot of nail holes like these.

Nail holes, filled, sanded
After filling with putty and sanding, the same holes looked like this.  There's a bit of discoloration around the nail holes yet, but they almost look like tiny knots.

Pine butcher block counter section, sanded
Viewed from the angle of a typical adult human walking by, the now-filled holes look downright acceptable.  However, with a lot of board-to-board color variation like this, the sawdust used to make the putty doesn't actually match any of the wood colors perfectly.

Pine butcher block counter, sanded
Back in place in the kitchen, it's time to add some water resistant coating.  We could have maybe foregone the finish, but Jake does a lot of drooling when Katie's cooking.  Better not to risk it.

Pine butcher block color difference with mineral oil-beeswax finish
We used the Howard's butcher block conditioner, which is a mix of mineral oil, beeswax, and Carnauba wax.  It definitely enhanced the wood color and soaked in pretty quickly.

Pine butcher block counter with mineral oil-beeswax finish
Finished top.  Katie approves.

Pine butcher block counter with mineral oil-beeswax finish
There's a bit of a sheen to it, but not too bad.

Poor-fitting cabinet door
Add some rustic-looking doors, and this thing is starting to get some personality!  Of course, if you build the doors while the top is off, they might not fit perfectly.

Good-fitting door
There, that's better.

Pallet wood shelves
Oh yeah, forgot to mention the shelves.  They're reclaimed pallet wood from the two best pallets we've ever acquired.  The top was hardwood (aspen, judging by the scent when cutting it), the bottom had some nice blue-stain pine.

Silicone sealant on butcher block counter
Finally, seal the edge with some silicone caulk to prevent water from getting back there and to prevent potential admirers from noticing the uneven ends.

Finished butcher block counter from reclaimed pine
Done! (as long as we decide not to coat the doors...)

Monday, February 8, 2016

Non-Maple Syrups on Tap

It's tree-tapping season!  Since we're huge pancake lovers, we've been keen on tapping trees for quite a while.  Two potential problems, though, are that we live in suburban Denver (is there enough of a cold period to generate a significant sap flow?), and we've got exactly one maple tree in our yard, which isn't big enough to tap. (It's not even an actual sugar maple--it's a silver maple!)

We do, however, have several non-maple trees that are big enough.  And since the process is pretty much the same, we figured we'd tap what we've got and see what we get!  Several places note anecdotally (e.g., here) that other tree species can be tapped (with tempered expectations because the sugar content and/or sap volume is lower than for sugar maples), and some even talk about tapping coniferous trees!  But with few exceptions (mostly for other types of maples, birches, or walnuts), these sources don't give much in the way of what to expect in terms of yields or flavor.  Looks like a data gap waiting to be filled!  We ordered up a set of 10 taps from the internets, scored some free buckets from the local grocery store bakery, and set 'em up yesterday.

We went around the yard and measured tree circumferences at about chest height.  The diameter is the circumference divided by pi (d = c/π); and a general recommendation is to tap trees no smaller than 10 inches in diameter.  Looks like we've got two each of box elders, Bradford pears, Siberian elms, and Colorado blue spruces, along with a Lombardy poplar and an invasive Tree of Heaven that qualify.  We'll probably pass on the spruces this year.  The tapping process is not supposed to hurt the tree or affect its longevity, but the elms and the Tree of Heaven would surprise us if they lasted beyond this year anyway.

The buckets are 3.5 gallons and used to have "donut glaze" in them.  We washed them out in the bath tub, although if we had thought ahead a little, washing them outside with the hose last summer would have been a lot easier.

The taps came with two-foot sections of tubing attached, the ends of which we warmed up with hot water to make them easier to push onto the barbs of the taps.

We connected the tubing to the taps in the kitchen, before we went outside.

One last bit of prep (heh) was to add a duct tape stopper about 1.75" up the drill bit so we don't go too far into the tree.  We also drilled holes in the bucket lids; the tubing said 5/16", but it needed a hole a little larger than 3/8" to fit through.

First hole in the boxelder, and it started dripping immediately.  That's a good sign!

The two box elders that were big enough to tap are actually two trunks on the same tree.  It's also right on the property line, so we don't have access to the south side, which is the side most preferentially tapped.  The East side will have to do!

Here are the other three trees we tapped with out first five buckets.  None of them had sap running right away.  We scored three more buckets the next day, so the two elms and the other Bradford pear are next in line.  Woo hoo!  Visions of pancakes are dancing through our heads.

What kinds of trees are you tapping this year?


Saturday, February 6, 2016

Brat Strata

We had some extra buns and cabbage to use up recently, and we thought, "we oughta make a strata! What goes good with buns? Hamburgers, hot dogs...brats!"  Having already done a hamburger-type strata, and having more of a hankering for brats than hot dogs, we forged ahead with a brat-themed strata. 

Sauteeing venison and onions
We started by sautéing a pound of ground venison (thanks Uncle Pete!) with a couple chopped, medium-size onions. For seasoning, we kind of winged it with whatever we had in the cupboard (and it wasn't bad by any means), but next time we'll probably follow expert recommendations a little closer.  One thing that worked well, though, was to season the meat and onions extra heavy so we didn't have to add much to the rest of the dish.  Similarly, we wanted sauerkraut, but had only cabbage and didn't want to wait several weeks to eat supper.  So, we made up a sort of 'instant sauerkraut' recipe that was passable, but something like this or this might have made Katie's taste buds a little happier.

Baking brat strata
We layered the sliced buns, meat/onion mix, sauerkraut, and some sharp cheddar in a 9" x 13" pan, whipped up a mix of six eggs topped up to 3 cups with milk, and poured it over the top.  Into the oven at 350 °F for 50-60 min.  Hey, that does actually smell like a brat!

Brat strata on plate
It goes great with traditional brat condiments--mustard and, if you're a heathen American, ketchup.  Pretty good!

The recipe:
1-1.5 lb. ground venison
2 medium onions, chopped
1 qt sauerkraut
Brat seasonings to taste, then doubled
Sliced bread or buns to make two layers in a 9" x 13" pan
1 lb shredded cheese (we used cheddar)

6 eggs
Enough milk to top up eggs to 3 cups total

Sauté the ground venison and onions in a frying pan over medium heat until meat is browned and onions are translucent, seasoning with favorite brat seasonings.  Layer the bread, browned meat/onions, sauerkraut, and cheese in a 9" x 13" pan, starting with bread and ending with cheese, aiming for two layers each. Beat together eggs, and milk. Pour over layers and set in fridge for several hours or overnight. Bake at 350 °F for 50-55 min, until center is lightly set and top is golden brown. Allow to cool and top with favorite brat accoutrements.


Monday, February 1, 2016

Cheesy Venison-Stuffed Squash Boats

We did another experiment in the kitchen this weekend, and it worked!  Jake will never get tired of exclaiming 'hypothesis supported!' after a successful culinary trial (and Katie will probably never get tired of hearing it, because that sort of thing never gets old).  In any case, this one will help us make sure we use up our winter squash before spring. 

These guys were our squash of choice.  We didn't know the variety until we looked it up, but they appear to be Delicata-type specimens.

We cut 'em in half and scooped out the seeds, then set them in about 0.5" water in a cookie sheet to bake at 350 °F for 30-40 min.

Meanwhile, we cooked up a batch of brown rice + wild rice.  This is way too much to stuff into just those squash.  We should have actually started the rice first because it took longer to cook than the squash.  Diced potatoes are an acceptable substitute for rice, if preferred.

While the rice and squash were cooking, we sauteed up some venison chops, then diced them.  Pro tip: when they're cut into small pieces, taste testing is more socially acceptable.

When the squash-ispheres were done (easily pierced by a fork), we seasoned them up with salt, pepper, garlic powder, onion powder, basil and rosemary.  The same seasonings went on the rice, and on the venison, while cooking.

Then we stuffed the squash full to bursting with rice and venison cubes, and covered each one with a generous helping of cheese.

A few minutes back in the oven to make everything melty and delicious, and we're good to go!

As it turns out, the amount of time it takes to make the cheese appropriately melty is roughly the same as it takes to make a fruit salad--apple, orange, banana (one each), pineapple (half a pint jar), and vanilla yogurt (1 cup).  Goes well with black raspberry wine.  One whole squash is a good serving if you're really hungry or it's a smaller squash (maybe up to 1.5 lbs? We didn't weigh them, unfortunately.)

The recipe:
Two winter squash, 1-1.5 lbs each, cut in half and cleaned of seeds
1 cup cooked rice (or thereabouts)
0.5 lb sauteed venison chops
1 Tbs butter
Salt, pepper, garlic powder, onion powder, dried basil, dried rosemary to taste

Start rice cooking (we used 0.5 cup brown rice + 0.5 cup wild rice in 3 cups water).  Set squash halves cut side down on a cookie sheet in a half inch of water and roast at 350 °F for 30-40 min.  Season venison with salt, pepper, garlic powder, onion powder, basil, and rosemary to taste, and sauté in butter. When cooked to preference, dice. 

When rice is done, season it with the same seasonings.  When squash is tender enough to be easily penetrated by a fork, remove from oven, flip skin-side down, and season it similarly.  Stuff squash with rice and venison, and top with shredded cheese.  Return to oven until cheese is melty.  While waiting, make fruit salad and pour wine.  Cancel plans for rest of evening, enjoy meal and postprandial somnolence.


What's your favorite winter squash recipe this time of year?