Thursday, May 2, 2013

Pasta Primaveragus

Every once in a while when Katie gets home from work, she's on a mission to build the perfect supper.  She's got a clear vision of what should happen with the leftovers in the fridge and freezer, and the veggies that are ripening in the garden.  Last night was one such night.  Let's tag along and see what she's making!

First she got the asparagus out of the fridge, put it on a cookie sheet, and dusted it with pepper and garlic powder.  Asparagus on a cookie sheet?  In the oven at 375 °F for 20 minutes?  Intriguing.

She sliced up some mushrooms and put them in a frying pan with a little olive oil.

Then she said, "Jake, go cut some swiss chard from the coldframe.  It's trying to bolt, so cut most of it."

I had to chop it up and add it to the mushrooms.

Now she's making noodles!  Looks like 2.5 cups of whole wheat shells.  The best part about making whole wheat noodles is the leftover water.  Add some honey and bam! Liquid graham cracker.  It's the beverage that goes with any meal.

The chard and the mushrooms get stirred together?  Well, ok...actually, that looks good enough to eat!

Oh!  That's the leftover pasta sauce from the fridge!  Apparently it goes on the noodles.  Katie says, "Jake, stop taking pictures over my shoulder.  You're making it hard to scrape the rest of the sauce out of the jar."

The noodles get seasoned with garlic and onion powders, pepper, and green onion powder, too!  That also looks good enough to eat.

The asparagus looks roasted now.  Smells roasted, too.  Katie says, "Jake, stop drooling on the camera."

So, the chard and mushrooms get mixed in with the pasta, the roasted asparagus gets set next to it, and the whole shebang gets sprinkled with parmesan cheese.  Her vision is complete!  She probably picked the yellow can to complement the colors of the food.  She's good with that kind of stuff.

When we were all done eating that, Katie said, "Let's make some more room in the freezer!"  We have blueberries and strawberries from last summer that we need to use up to make room for new ones!  So she added a couple handfuls of blueberries and a handful of strawberries to a cup of milk or so and took to it with the immersion blender.  In a couple minutes, the mixture transmogrified into a tasty smoothy/sorbet-like thing!  Yay for dessert!

The recipe:
1 bunch asparagus (~1 lb or ~15 pieces)
1 lb mushrooms, sliced
~2 tablespoons olive oil
1/2 lb swiss chard, chopped

2.5 cups pasta
1 cup pasta sauce
Parmesan cheese to sprinkle on top
Seasonings to taste (garlic powder, onion powder, green onion powder, pepper, dried basil)

2/3 cup frozen blueberries (when freezing, we added 1 cup sugar to 5 cups blueberries, so if your berries are unsweetened, you can add a tablespoon or two of sugar if you like)
1/3 cup frozen strawberries
1/2 cup milk

Set the asparagus on a cookie sheet, drizzle with olive oil, sprinkle with seasonings to taste, and set in oven at 375 °F for 20 minutes.  Check doneness at 12-15 minutes.  In the meantime, sauté mushrooms and chard.  Cook noodles and drain, reserving liquid.  Add pasta sauce, more seasonings, and mushroom-chard combo to the noodles.  Mix well, serve with the roasted asparagus and sprinkle Parmesan cheese on top.

If you still have room, blend berries and milk with immersion blender, taking care to lick up all spatters.  Serve in bowls and eat with spoon if the product is more solid, or serve in mugs and eat with straw if product is more liquid.


How are you mixing your stocks of preserved foods from last summer with the early spring treats that are starting to come up fresh?  Tell us about it in the comments section below!

Sunday, April 28, 2013

Dent-de-Lion

One of the first plants up in the spring is the humble and hardy dandelion.  Although most people wrinkle their nose at the thought of ingesting this common weed, the main reason it's here in the U.S. at all is that early colonists recognized it's value as an edible plant.  Every part of the dandelion is in principle edible, although we haven't yet tried the roots. The greens are very high in vitamins A, C, and K, and a good source of many other trace minerals as well.  The flowers are also high in vitamin A (ok, technically they're high in beta-carotene, which is metabolized into vitamin A).  Additionally, dandelion blooms are an important early-season source of pollen and nectar for honeybees, which are just coming out of their winter doldrums and looking for some fresh nutrition.  We'll save some dandelions for the bees, but we definitely like to take a few for ourselves, too.  Usually a few meals are enough to satisfy our major hankering for the season and the bees can have the rest (since they seem to regenerate their flowers without too much trouble).

Take your time, little bee.  After you're done, we'll take the flower for our own food!  This picture also explains why herbicides shouldn't be sprayed on dandelions.


For a long time, our favorite way to ingest all this dandelion-based nutrition was via dandelion pancakes because the flower petals were the only thing that wasn't too bitter for us to eat.  But then we read an article by John Kallas that explained everything.  It was as if the clouds had parted and a multitude of angels had delivered unto us a great truth (that is to say, thanks, Dr. Kallas).  Basically, fresh dandelions are so gut-wrenchingly bitter because they contain a class of compounds known as sesquiterpene lactones, such as the taraxinic acid derivative below (hence the dandelion's genus, taraxacum).

11, 13-dihydrotaraxinic acid-1´O-ß-D-glucopyranoside, one of the main reasons fresh dandelion greens don't taste good.

Fortunately, these compounds have an appreciable solubility in water, so it's possible to extract them by soaking the dandelions.  As Kallas notes, many recipes call for boiling the dandelion greens to make them less bitter, but we've had good luck with just soaking them in clean room-temperature water for 15 minutes or more (try a ratio of about half a cup of chopped greens to four cups water).  If the greens are still bitter after 20 minutes, change the water and soak again.  Since the water will contain the extracted compounds, it will taste slightly bitter.  However, the compounds will be very dilute, and the water may even seem drinkable as a sort of bitter tonic. (It does to us!)  In the olden days, they used to say bitter tonics were good for the blood, or they'd put hair on your chest, or something like that.  Andyway. since it's just about the right time of year to be picking the first dandelions, we thought we'd put together a dandelion-themed meal to celebrate the arrival of spring!  We've got our favorite dandelion pancakes, accompanied by sautéed dandelion greens, and complimented with some other side dishes.  This is going to be good!
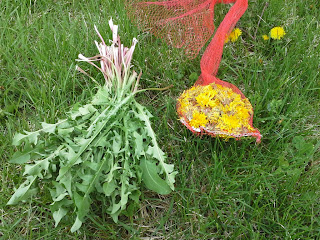
The day's catch: some green, some yellow.  For the greens, many folks recommend finding young or shaded greens--both indicate fast-growing leaves.  Fast growing = less bitter to begin with.  Also, for the pancake recipe below, we picked about 100 blossoms.  It sounds like a lot, but it only took about 8 minutes.
Back at the Lab, we've rinsed the greens and got them looking nice for their photo shoot.
Next we chopped 'em up into bite-size pieces.  We've got about a cup of chopped greens here.
Next, we add the chopped greens to a bowl of water.  For fresh salad greens, cold water is probably best.  We're going to sauté ours, so the water is lukewarm.  (Warmer water extracts faster, and we don't care if the leaves get a little wilted.)  Also, our ratio of greens to water is a little high (here we used the one cup chopped greens in about four cups water--probably half that would be better).  Once they're soaking, we set them aside while getting everything else ready.  They should soak for at least 20 minutes.  As a test, we try one piece after 20 minutes--if it's still too bitter for our liking, we change the water and soak another 20 minutes.
In the meantime, we started extracting the yellow petals from the flower heads.  The technique we found to work the best is to get a thumbnail between the outer green and inner yellow parts, work down to the base of the flower, then kind of dig across to get the petals out.  (Edit: actually, we found a better way the next spring.) This is the most tedious part of the whole process.  We should invent a dandelion petal separator to make it easier.  There's probably a huge market for that sort of thing.
A perfect scrape--good job, Katie!
Looks like a successful operation.  The 100 flowers yielded about a cup of petals.
The process from here is pretty similar to making blueberry or chocolate chip pancakes, except instead of adding blueberries or chocolate chips, add dandelion petals.
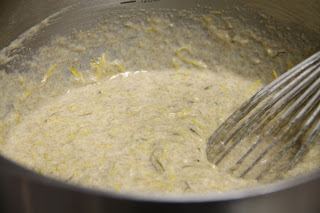
Make up your favorite pancake batter (one sample recipe below), then mix in the dandelion petals.  Looks nice and hearty!
We drop the batter by the half-cupful onto a hot griddle or frying pan.  This particular specimen is lookin' good! 
Let's see what foods of other colors we have around here that would go well with dandelion pancakes and greens...how about orange?  Roasted sweet potatoes!  We cubed 'em up, drizzled with olive oil, add favorite seasonings (e.g., salt, pepper, garlic powder, onion powder, basil, and rosemary), and set to roast while making the pancakes.
Mmmmm...roasted sweet potatoes.
When the pancakes are finishing up and there's some room in the frying pan, replenish the oil and add the chopped, soaked (and drained) greens. If you look close, you can see the essence of dandelion emanating from the pan.  It smells glorious.  Season these to taste also, e.g., with salt, pepper, and basil.
While out collecting dandelions, make sure to keep an eye out for other tasty springtime treats.  Actually, our trip started out primarily as a morel-hunting expedition, but after four hours of searching, we've only got this one little guy to show for our efforts (plus the dandelions and a small pile of ticks).  Evidently, our morel compass is a little rusty.  Still, we'll fry up our find with the dandelion greens, and it will be tasty!
Once we realized we had red strawberries and blue blueberries in the freezer from last summer, and some violet-ish wine in the closet, we figured we could invite all of Roy G. Biv to supper.  (the blueberries and wine have to account for the 'b,' the 'i,' and the 'v').  There was much internal debate about whether to put Katie's half of the mushroom on top of the dandelion greens as a display piece, or hide it inside as a scrumptious surprise.  In the end, the former won out.

The recipes:

Dandelion Pancakes:
2 Eggs
2-1/3 cups milk
1/2 cup sugar
1 tablespoon lemon juice
1 teaspoon vanilla
1 teaspoon salt
3 cups whole wheat flour
2 teaspoons baking soda
1 cup dandelion petals

Whisk together eggs, milk, sugar, lemon juice, and vanilla. Add salt, flour, and baking soda, stir until combined.  Fold in dandelion petals, drop by half-cupful onto hot griddle or frying pan, fry until golden brown on both sides, flipping once.  This recipe makes very thick pancakes--for thinner cakes increase milk or decrease flour.

Sautéed Dandelion Greens:
~1/2 pound dandelion greens
water for soaking
one scrawny morel mushroom (optional)
salt, pepper, basil to taste

Pick fresh dandelion greens, rinse, chop, and soak in cold-lukewarm water for at least 20 minutes.  Use a ratio of 1/2 cup dandelion greens to 4 cups soak water.  If the greens are still too bitter after 20 minutes soaking, change water and soak another 20 minutes.  Drain greens and sauté in butter or olive oil, seasoning to taste with salt, pepper, and basil.  Serve hot, with co-sautéed mushrooms if desired.

Roasted Sweet Potatoes:
3-4 medium sweet potatoes, trimmed of bad spots and diced
1/4 cup olive oil
1/2 teaspoon each salt, pepper, dried basil, dried rosemary, onion powder, garlic powder

In a large bowl, toss diced potatoes with oil and seasonings.  Turn out onto cookie sheet, bake at 425 °F for 25-35 minutes, or until taters are soft enough to eat.


Do you have a favorite recipe for dandelions?  What are some of your favorite spring greens to eat this time of year?  Tell us about it in the comments section below!


Thursday, April 25, 2013

The Magic of Coldframes

If you garden in a cold-weather climate, one of the nicest things to have this time of year is a coldframe.  In many iterations, a coldframe is essentially a miniature greenhouse used to "harden off" seedlings before planting into the ground or to extend the growing season.  Commercial kits are available, but in our opinion it's better to scavenge the materials and design your own to get the most flexibility at the lowest cost (and prevent those old windows from going to the landfill!)  We were originally going to use this post as an excuse to show off our developing Google Sketchup skills, but then we realized that we designed the whole thing around the particular windows we scavenged, the dimensions of our front deck, the height of the window looking over the front deck, and the pots we wanted to fit inside.  That is to say, the highly specific dimensions we used for our situation would likely be completely arbitrary for yours.  Instead, we decided to show you our design and point out a couple design features we incorporated to facilitate moving big (heavy) pots in and out of the coldframe, as well as a few lessons we learned that we'll improve the next time around.

Here it is all brand-spankin' new and closed up early during its first spring.  We scavenged the windows for free from Craigslist, although admittedly the wood and hardware is new. We didn't worry too much about the angle of the roof relative to the sun; we just wanted to make sure the back wall fit under the window in the house and the front wall had enough room for our potted plants.  If you look close, there's a sprig of swiss chard poking up just left of center.
And here's Katie a minute later, holding it open to show all it's degrees of articulation.  The 'barn doors' on the front make it a lot easier to get big pots, like whiskey half-barrels, in and out without having to lift them up over the front.  Note that the 'Z' piece has it's low end on the same side as the hinges--that makes the door less likely to sag as time goes on.  If you want to make doors on the front, it will help to have a flat space in front of the coldframe.  Also, don't worry--Katie didn't stand there all summer.  Normally we prop the windows open with sticks on warmer days, although there are probably better ways to vent it (see below).
A couple months later it's looking a little fuller.  The two whiskey half-barrels fit nicely across the back. When the weather gets nice enough that the windows are no longer needed, we take them off and tuck them underneath.  If the coldframe is going under a roof line, having the row of windows in the back can help disperse the water running off during a heavy rain.  The whiskey barrels have potatoes (left) and garlic (right) in them.  Note that the window by the potatoes has a crack in it--we found out the hard way that it's important to have a secure way to hold the windows open.  Just propping the windows open with sticks doesn't really hold them against strong winds or clumsy Jakes.  We're planning to attach an 'adjustable' stick to the 'removable' windows that we can secure to the frame between the 'removable' and 'fixed' windows.  We'll write it about soon.
When we harvested the potatoes in the fall, we planted some swiss chard seedlings in their place.  As an experiment, we also had some swiss chard growing in the square foot garden without protection from the coldframe.  This picture is from the following March (a few weeks ago).  The chard outside the coldframe froze off, but the stuff inside is flourishing.  Fresh greens from the deck in March?  Yes, please!
Some of the garlic we didn't eat as greens last year also over-wintered well and is looking quite robust.  (We didn't try any garlic outside, but if he had, it definitely wouldn't be this far along.)  We're looking forward to some luscious bulbs in a few weeks!  We also had some potted strawberries that came through the winter in the coldframe, which we moved outside last week.
One thing we should have done right away is to protect the wood on the coldframe with some kind of finish or paint.  We didn't get around to it, and although it makes this picture of the chard we harvested last week look extra rustic, we'll probably have to replace the wood on the coldframe sooner because of it.

Do you have a coldframe?  Did you incorporate any unique design features?  Tell us about it in the comments section below!

Monday, April 22, 2013

Earth Nog

For any of our loyal readers who might be getting nervous that April is almost over and we haven't designated a holiday this month to celebrate with eggnog, don't panic: Earth Day is today!  And boy, what a treat!  We've received a couple requests to prepare a pasteurized eggnog from some folks who definitely love their eggnog year round, but who aren't in love with year-round salmonella risk.  It's worth noting that the possibility an egg contains salmonella is small to begin with, but has very little to do with the style of agriculture that produced it.  The bacterium can come from many places, including the most natural of environments, although there is reason to believe that smaller flocks and less confinement can lead to lower salmonella counts.

As with everything on the Internets, there are differing opinions on what temperature is required to rid the eggs of salmonella.  The USDA and CDC say that 160 °F for any amount of time is a safe bet, but long times at lower temps will also work.  Since the egg can start to cook at temperatures as low as 140 °F, the pasteurization could potentially yield chunks in the eggnog. Some sources claim that adding an acid to the yolks can prevent them from getting chunky on heating, but their recommended process is somewhat involved since it's important to make sure that the temperature throughout the yolks stays fairly uniform.  However, the USDA also notes that if mixing some of the milk in the eggnog recipe with the egg yolks before heating might yield a good eggnog.  In this case, it's basically like making a custard that is then diluted with the rest of the milk.  That's the approach we'll try here for making our earth-flavored 'nog.

As before, start with six egg yolks and three cups of milk.  This time, however, only use 1.5 cups of milk at a time.

Mix together the yolks and 1.5 cups milk until homogeneous (bubbles are ok). EDIT: Make sure to beat the yolks first until stiff and pale yellow.  It seems to make the final product thicker and creamier.

Bring the temperature of the mixture up to 160 °F, either in a saucepan on the stove (slow) or in the microwave (much faster).  The trick is to make sure that the temperature rises fairly uniformly so that one part doesn't start to cook (denature) before other parts are pasteurized.  In the microwave (the way we did it), we started with two rounds of one minute, each followed by temperature checks and stirring, then a round of 30 seconds and stirring, then a round of 20 seconds and stirring.  We were skeptical that it would stay smooth to 160 °F, but sure enough it did!

Once it hits 160 °F, all the potential salmonella have been defeated and the rest of the ingredients can be added (1/3 cup sugar, 1/4 cup cocoa powder, 1 teaspoon vanilla extract, and 1.5 cups milk).  The order of addition isn't particularly important, but the sugar will dissolve faster in the high temperature egg-milk mixture than if the rest of the milk is added first (which will cool it down). 

Here we are: chocolate (earth-flavored) eggnog!  This recipe is actually much better chilled, unless you're into hot eggnog for some reason.  Don't tell Katie, but there's a gummy worm at the bottom of hers.  Also, before you wrinkle your nose at the thought of chocolate eggnog, consider that if a bowl of custard and a glass of chocolate milk got together one night, drank a little too much vanilla extract and made some bad choices, this is what the offspring would look like.  Maybe that analogy didn't help.  But really, it's good!

The recipe:
6 egg yolks
1.5 cups milk
another 1.5 cups milk
1/3 cup sugar
1/4 cup cocoa powder
1 teaspoon vanilla extract

Beat egg yolks and 1.5 cups milk until uniform.  Heat mixture to 160 °F, stirring often.  Add sugar and cocoa powder, stir until uniform, then add rest of milk and vanilla extract.  Chill and drink.

Have you made a cooked eggnog recipe before?  How did it turn out?  Tell us about it in the comments section below!


Thursday, April 18, 2013

SFG Drip Irrigation

A few days ago, we wrote about how we set up our square foot gardens on our front and back decks, and noted that the soil dried out quickly because it was only six inches deep.  About halfway through the summer we got smart and set up a drip irrigation system to help keep the soil moisture consistent, save water, and compensate for our absentmindedness in watering.  We ended up with two similar but distinct systems for the front and back deck, but they both work well enough to blog about!

On our front deck, we've got two five-gallon buckets that we use as simple reservoirs in a gravity-fed system.  We started by drilling holes in the buckets that are about the same size as our fittings (see next picture).
The fittings have pipe threads on one side and a hose barb on the other.  The exact size isn't too important, but the holes, barbs, and tubing have to be consistent.  We've got 3/8" holes and 5/16" tubing (if we're remembering correctly).  If the threads on the fitting are NPT, they'll be slightly tapered.  It's good to make the hole roughly the same size as the small end so there's a better chance it won't leak.  Wrapping the threads with Teflon tape can also help.
It still leaked a little, even after adding the Teflon tape, so we made a washer out of a piece of rubber.  This one is a piece of rubber pond liner, but it could also be a piece of spent bike inner tube or even something from the hardware store that's actually meant for this purpose.
We made ours two layers thick and stuck it on the tube fitting like so.
Last year it didn't leak, but this year it makes a slow drip...almost exactly at the rate we want for our watering.  So, not being perfectionists, we'll just position the fitting over the edge of the garden!
Cinder blocks make a nice stable base for the reservoirs.  Once we had them and the buckets in position, we cut the tubing to the right length (about four feet, so it reaches across the square foot garden).  The closest one in the picture is buried under the dirt for a stretch.
At the end of the tube, we folded it over and pinched it shut with a clamp.  There are probably more elegant ways to do it, but this works.
Now it's time to punch holes in the tubing so it drips out at the right rate (probably about 1 drip per 3 seconds).  There's definitely an art to this part.  We found that a needle is too small, but a 1/8" drill bit is too large.  The way that worked the best for us was to cut a small slit with a knife.  It's easier to see the drip rate if the buckets are filled with water first.
Lookin' good!
Oops!  We made this one too big.  Be careful not to do this.  Also be careful not to cut yourself, or you'll have to make the rest of the holes while clenching a piece of toilet paper in your other hand.
We were able to mostly salvage the too-large hole with a clamp.  This technique doesn't work quite as well if you cut yourself.  It turns out that if the drip rate is just right when you the holes are first cut, it will slow down and eventually stop a few weeks afterward. Probably a biofilm of bacteria is building up in the slit and eventually becomes thick enough to stop the flow (although we haven't scientifically verified that).  What works best for us is to start out with the drip rate a little bit too high, which still slows down over time but takes longer to stop completely.  Then every couple weeks we bend the hose near the holes to get the water dripping again.  Other than that, the only maintenance is to fill the buckets with water when they get low.
On the back deck, we've got a 20-gallon fish tank as the reservoir.  It's positioned under the roof line so it fills automatically whenever it rains. (1/4" of rain will fill it completely.  It's amazing.)  Also, the bottom is at a higher elevation than the garden.
For this one, we just use a siphon system.  We added a fitting to the end of the tubing just to keep it near the bottom of the tank, then ran the tubing out over the top and down into the garden.  We took a quick sip on the far end of the tube to get the siphon flowing, then when the tube was full of water, folded and capped with a clamp as above.  We only had to suck on the tubing until the water got about halfway to the end.  That way we didn't get any rainwater in our mouths.
We routed the tube around the plants (we even added a lemon tree in between just for fun) and cut holes in the tubing as above.  Since rain fills the reservoir, this system is even lower maintenance than the first one!  We do still have to bend the tubing to free up the holes every few weeks, but overall it works pretty well.  We've normally got two or three tubes running from this one, but the only thing in the garden so far is a few broccoli plants so we just left it at one tube for now.
We like the siphon system better than the bucket system.  It's easier to set up, requires fewer parts, and doesn't have any leak concerns (unless we cut the holes in the tubing too large).  Come to think of it, we could probably make a siphon work with the buckets, too.  We'll have to keep that in mind for next time.

Have you set up a drip irrigation system for your own garden?  How have you maintained a proper drip rate?  Tell us about it in the comments section below!